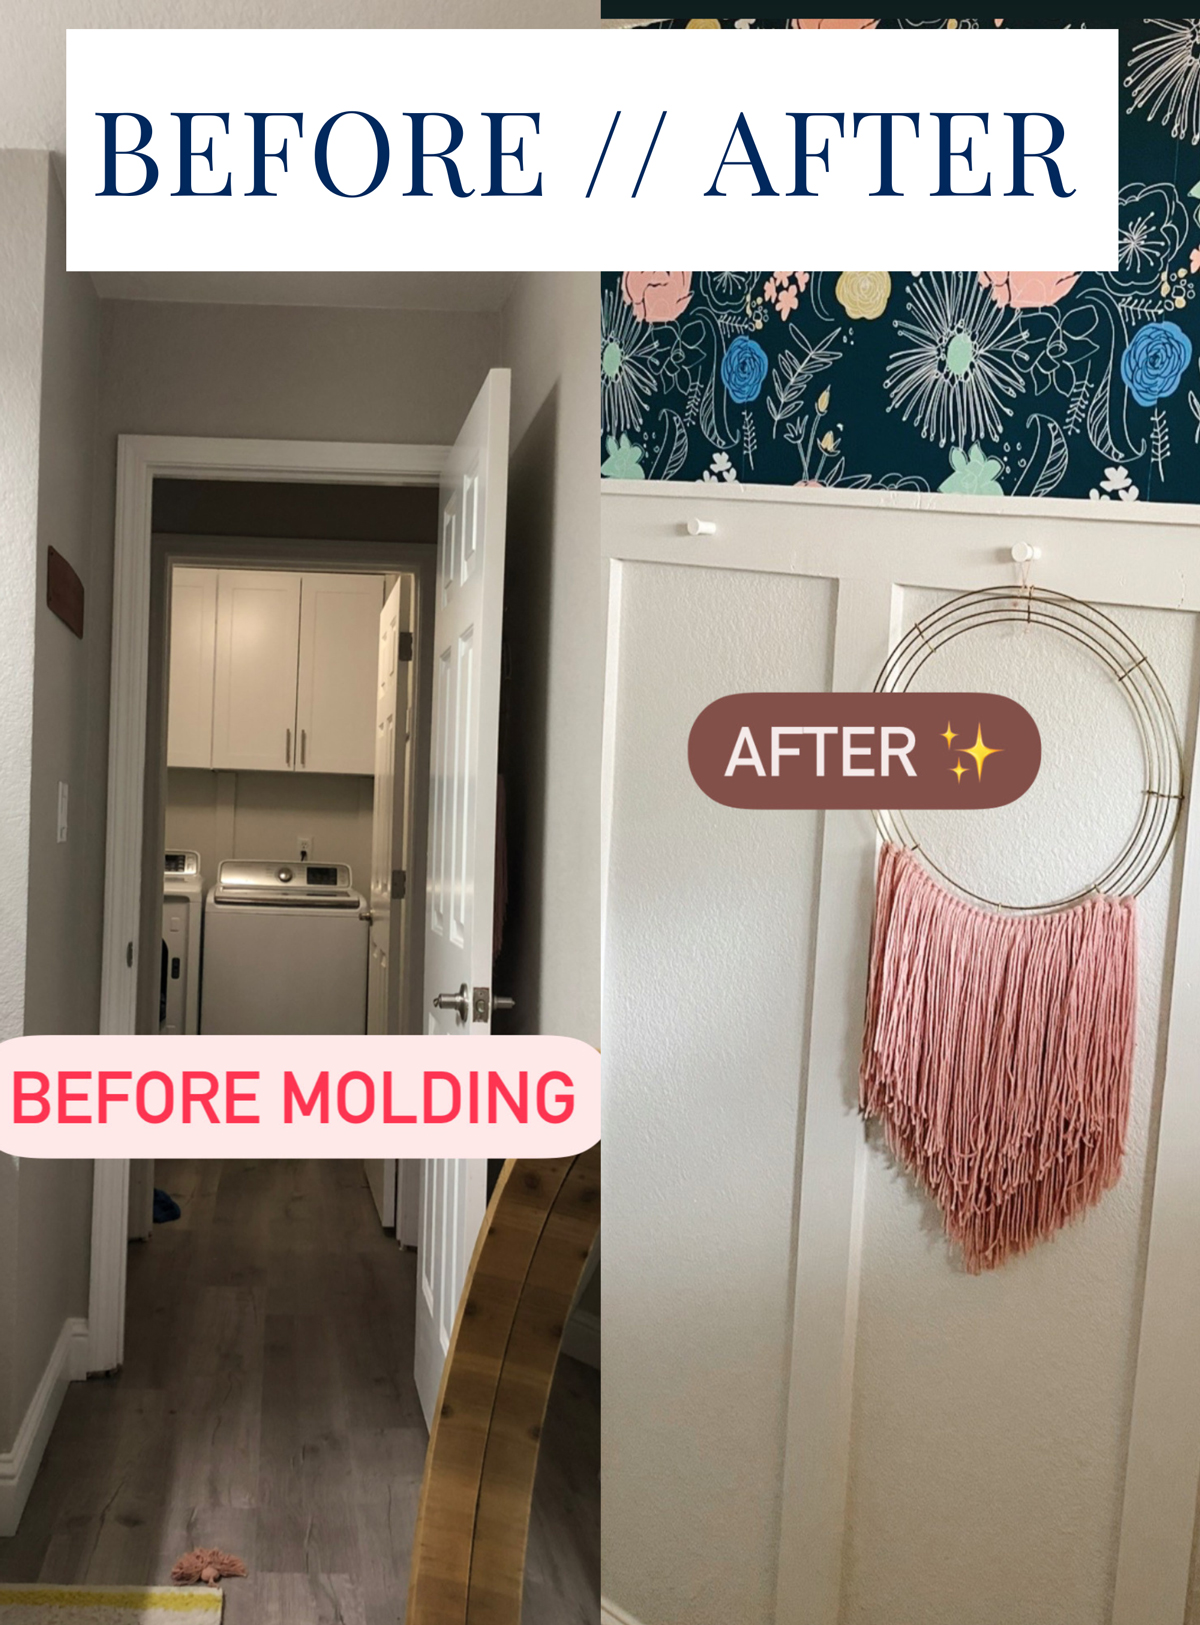
How to hang 1/2 wall molding for a small bathroom update with function and flair.
When we moved into this current house it had recently been flipped. This meant that I wasn’t doing big renovations in any of the rooms, but still wanted to add my own personal details and colorful touch.
So we decided to tackle a simple DIY project half wall molding to add character to my bathroom without a lot of work. Similar to the DIY electric fireplace, it’s getting a big bang for my DIY working effort.
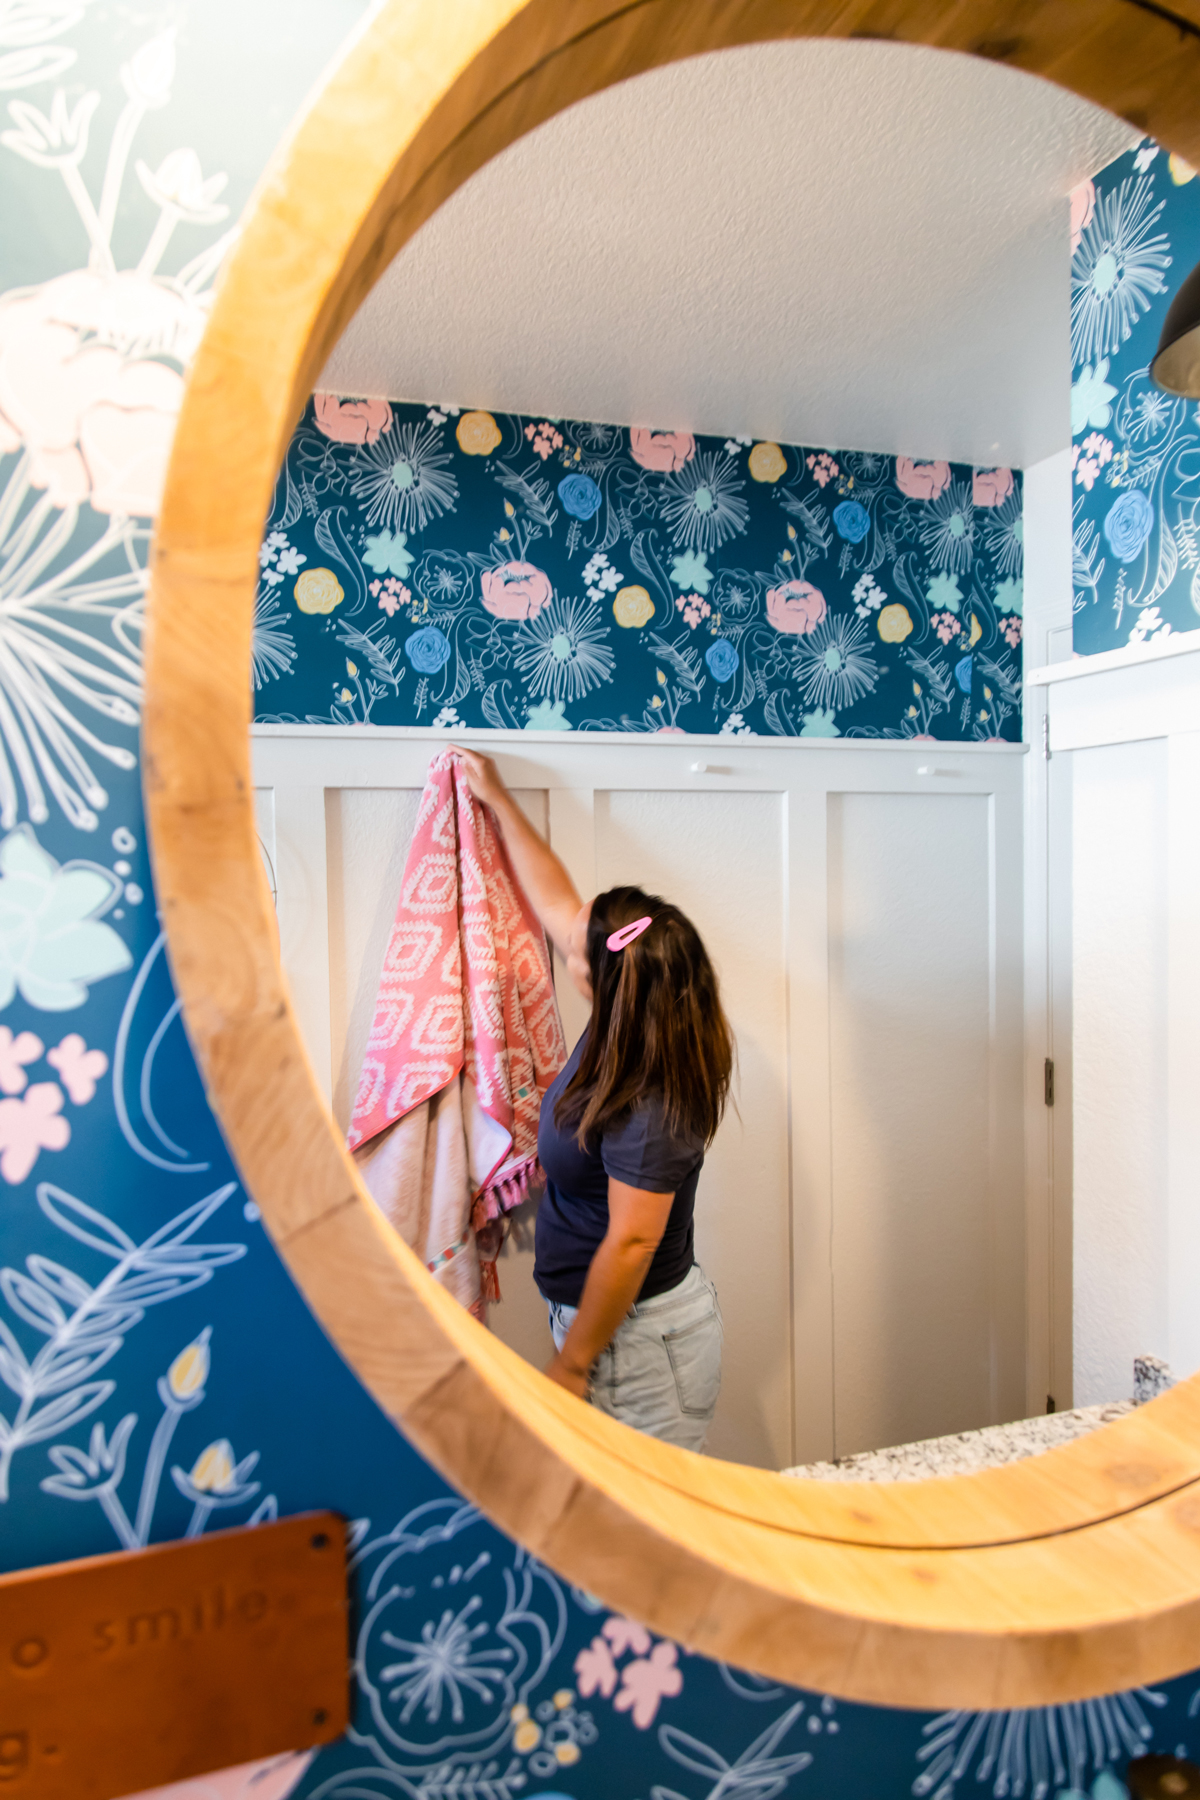
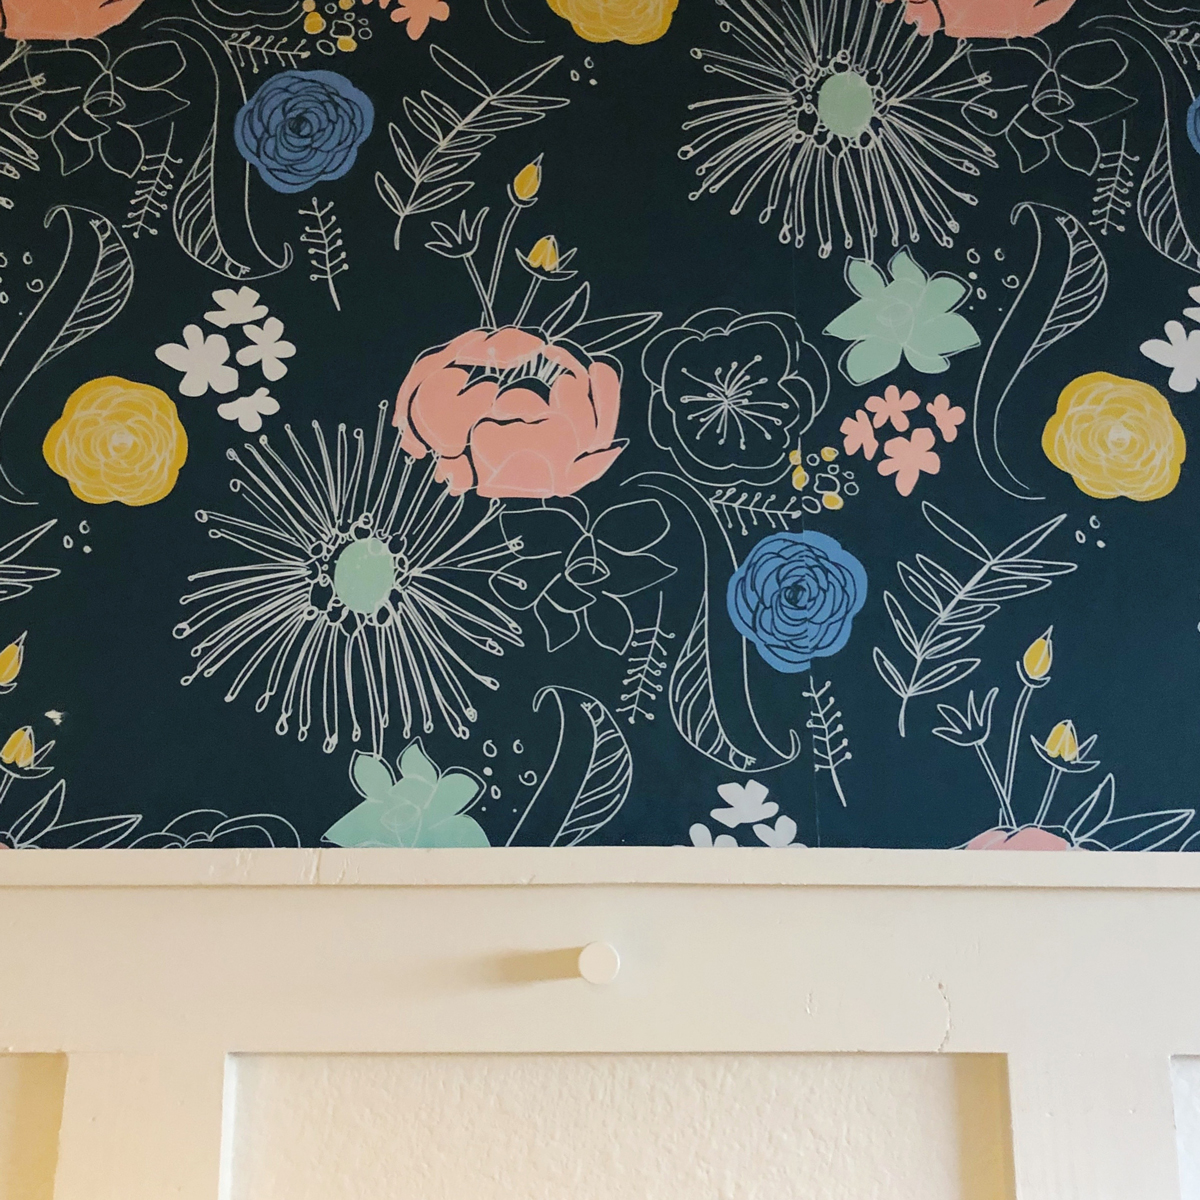
This type of molding is often used in traditional or classic homes and can give any bathroom a timeless look. When paired with my favorite wallpaper it brings a colorful dose of whimsy to an otherwise boring space. Read on to see the before & after molding photos and learn the EASY PEASY step by step process.

Honestly, this is one of the easiest projects you can do in a home to add instant character to any space.
Want to see how? Let’s go over the supplies you’ll need, the step-by-step process for putting up the molding, caulking it, and painting it to match the wall.
I’ll also give you tips and tricks along the way and explain why this project is worth tackling as a homeowner.
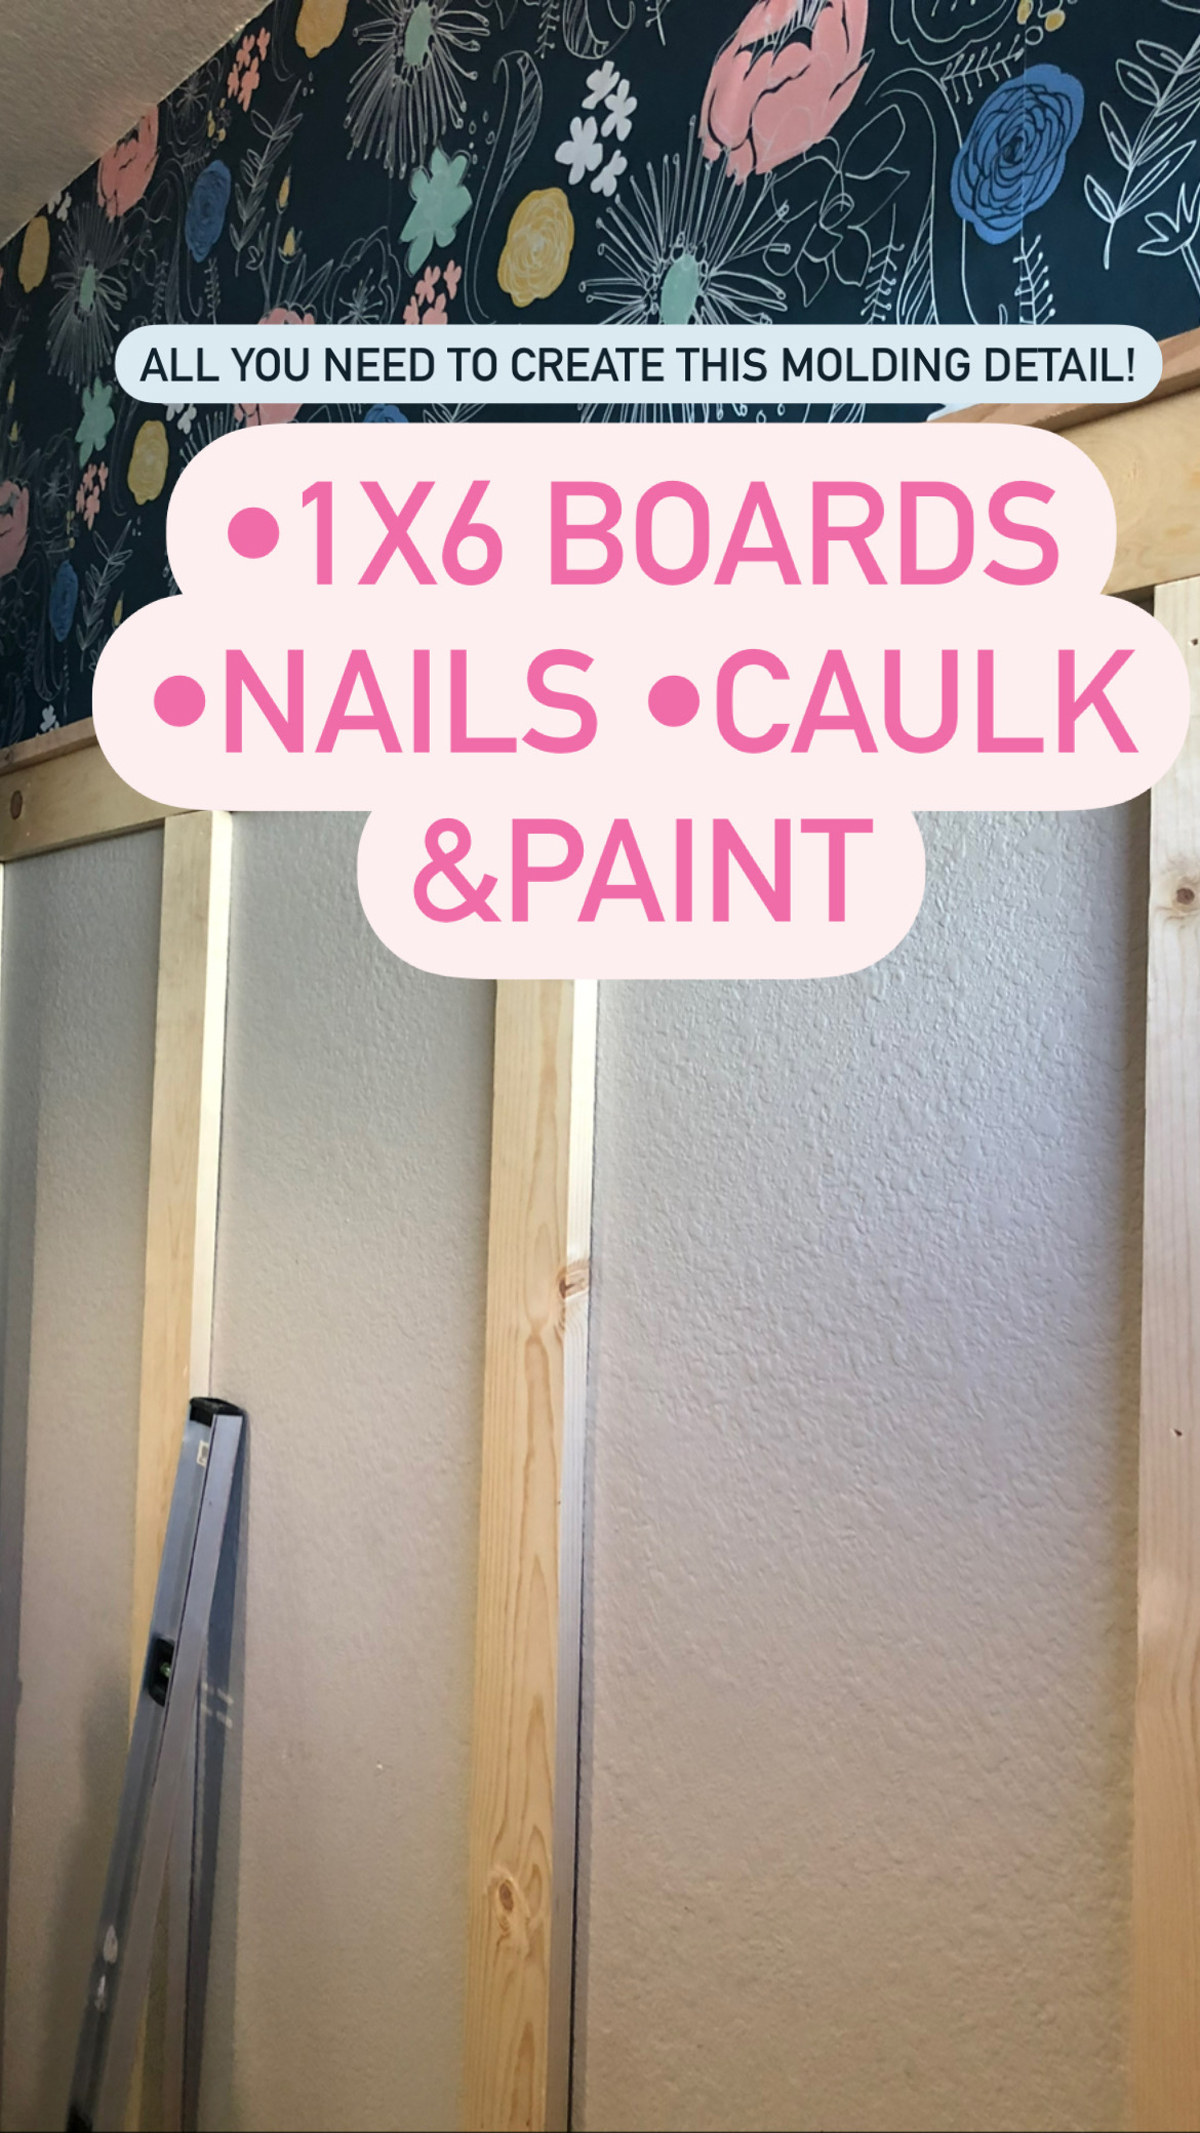
Supplies You’ll Need
Gathering all the supplies at once is a good plan. I’m using the wood dimensions we used here, but depending on your own particular space you might want to go thicker or thinner on the wood. I like the look of 1×6 for this space.
- 1×6 lumber boards
- 1×8 for the top & bottom (or whatever your baseboard style is)
- Chair rail to finish off the top
- Nail gun & nails
- Wood glue
- Level
- Paintable caulk
- Painter’s tape
- Sandpaper
- Paint and primer
Step-by-Step Process To Install 1/2 Wall Molding
Measure And Cut Your 1x6s
Start by measuring the length of the wall where you want to install the half wall molding. Mark off the distance where each board will sit on the wall to ensure you have even spacing that looks good to the eye. I like to start about 1/3 of the way into the wall when I’m doing this to ensure there’s no wonky spacing in the center of the wall.
Cut your 1x6s to the correct length using a miter saw or circular saw.
Pro Tip* If you don’t have a saw at home you can do this at the hardware store! In fact, if you are willing to wait at Home Depot for help, one of the associates will use their big machine to cut them all for size for you – saving lots of work at home.
Apply Wood Glue And Level
Apply a small amount of wood glue to the back of each piece of 1×6 before putting it up. This will help hold the molding in place. Make sure you are using a level and a measuring tape to get straight vertical lines here.
Nail The Boards Into The Wall
Use a nail gun to nail the 1×6 pieces into the wall. Make sure to place the nails in the studs whenever possible to ensure a secure fit. I choose pretty spacing over studs though anyday. 😉
Caulk the Seams
Once the wood boards are nailed to the wall, use paintable caulk to fill in any gaps between the 1×6’s and the wall. Smooth the caulk with your finger (get it wet first!), or a caulk smoothing tool works as well.
Allow this to fully dry – no matter how excited you are to paint here… just walk away until it is nice and ready for you! Learn from my messy mistakes.
Sand and Paint
Sand the caulk smooth once it is dry.
Then prime and paint the molding to match the wall. Use painter’s tape or my fancy paper trick to protect the wall and create clean lines.
Tips & Tricks To Get Bathroom Wall Molding Just Right
- Use a level to make sure the 1x6s are straight and even before you nail the first nail!
- Use wood glue to help hold the boards in place before nailing them to the wall.
- Make sure to sink the nails all the way into the wood to ensure a secure fit and easy caulking over the spots.
- Use painter’s tape to protect the wall and create clean lines when painting.
What to Expect While Tackling A Wall Molding Project
Putting up half wall molding with 1x6s and a nail gun can be a relatively straightforward DIY project, but it does require some basic carpentry skills. If you’ve never used a nail gun before, be sure to read the instructions carefully and practice on a scrap piece of wood before starting on your wall. I’d practice the caulking before and and the sawing as well if you are new to these types of projects.
One potential challenge of this project is ensuring that the wood boards are straight and spaced evenly. Use a level and you can even line up the boards before starting the instillation to help with this, and take your time measuring and cutting the wood. It’s better to take a little longer at this stage and mock it up correctly than to end up with crooked molding.
Another potential challenge is filling in the gaps between the 1x6s and the wall with caulk.
Use a PAINTABLE caulk and take your time to make sure the caulk is smooth and even. Sand the caulk smooth once it is dry before priming and painting for a clean and seamless look to your 1/2 wall molding.
Why This Is A Great Project to Tackle
Installing this 1/2 wall molding with wood boards and a nail gun is a great DIY project for several reasons.
First, it’s a relatively inexpensive way to add character and visual interest to your bathroom, no matter how small it is! Wall molding can give your bathroom a classic, timeless look that will never go out of style.
Second, this project is a great way to develop your carpentry skills. By using a nail gun and cutting your own wood, you’ll gain confidence in your ability to tackle more complex DIY projects in the future. Always a win! 😉
Finally, installing molding with a fun wallpaper on the top 1/2 is a great way to customize your bathroom and add a personal touch to your home without breaking the bank!
You can choose the size and style of the molding to match your existing decor or create a new look entirely. And just like my bookshelf in closet trick, only needing to buy 1/2 a walls worth of wall paper (or even 1/4 worth if you go high with your molding like we did), means you can splurge on a beautiful design and get the impact of a wallpapered room, while paying for less product.
Plus, because this project is seriously simple and can be completed in a weekend, like the Ikea pantry hack it’s a great way to feel accomplished and proud of your awesome DIY skills.
Overall, if you’re looking for a DIY project that’s both practical and aesthetically pleasing, this is it! You can transform your bathroom into a stylish, classic space that you’ll love for years to come.