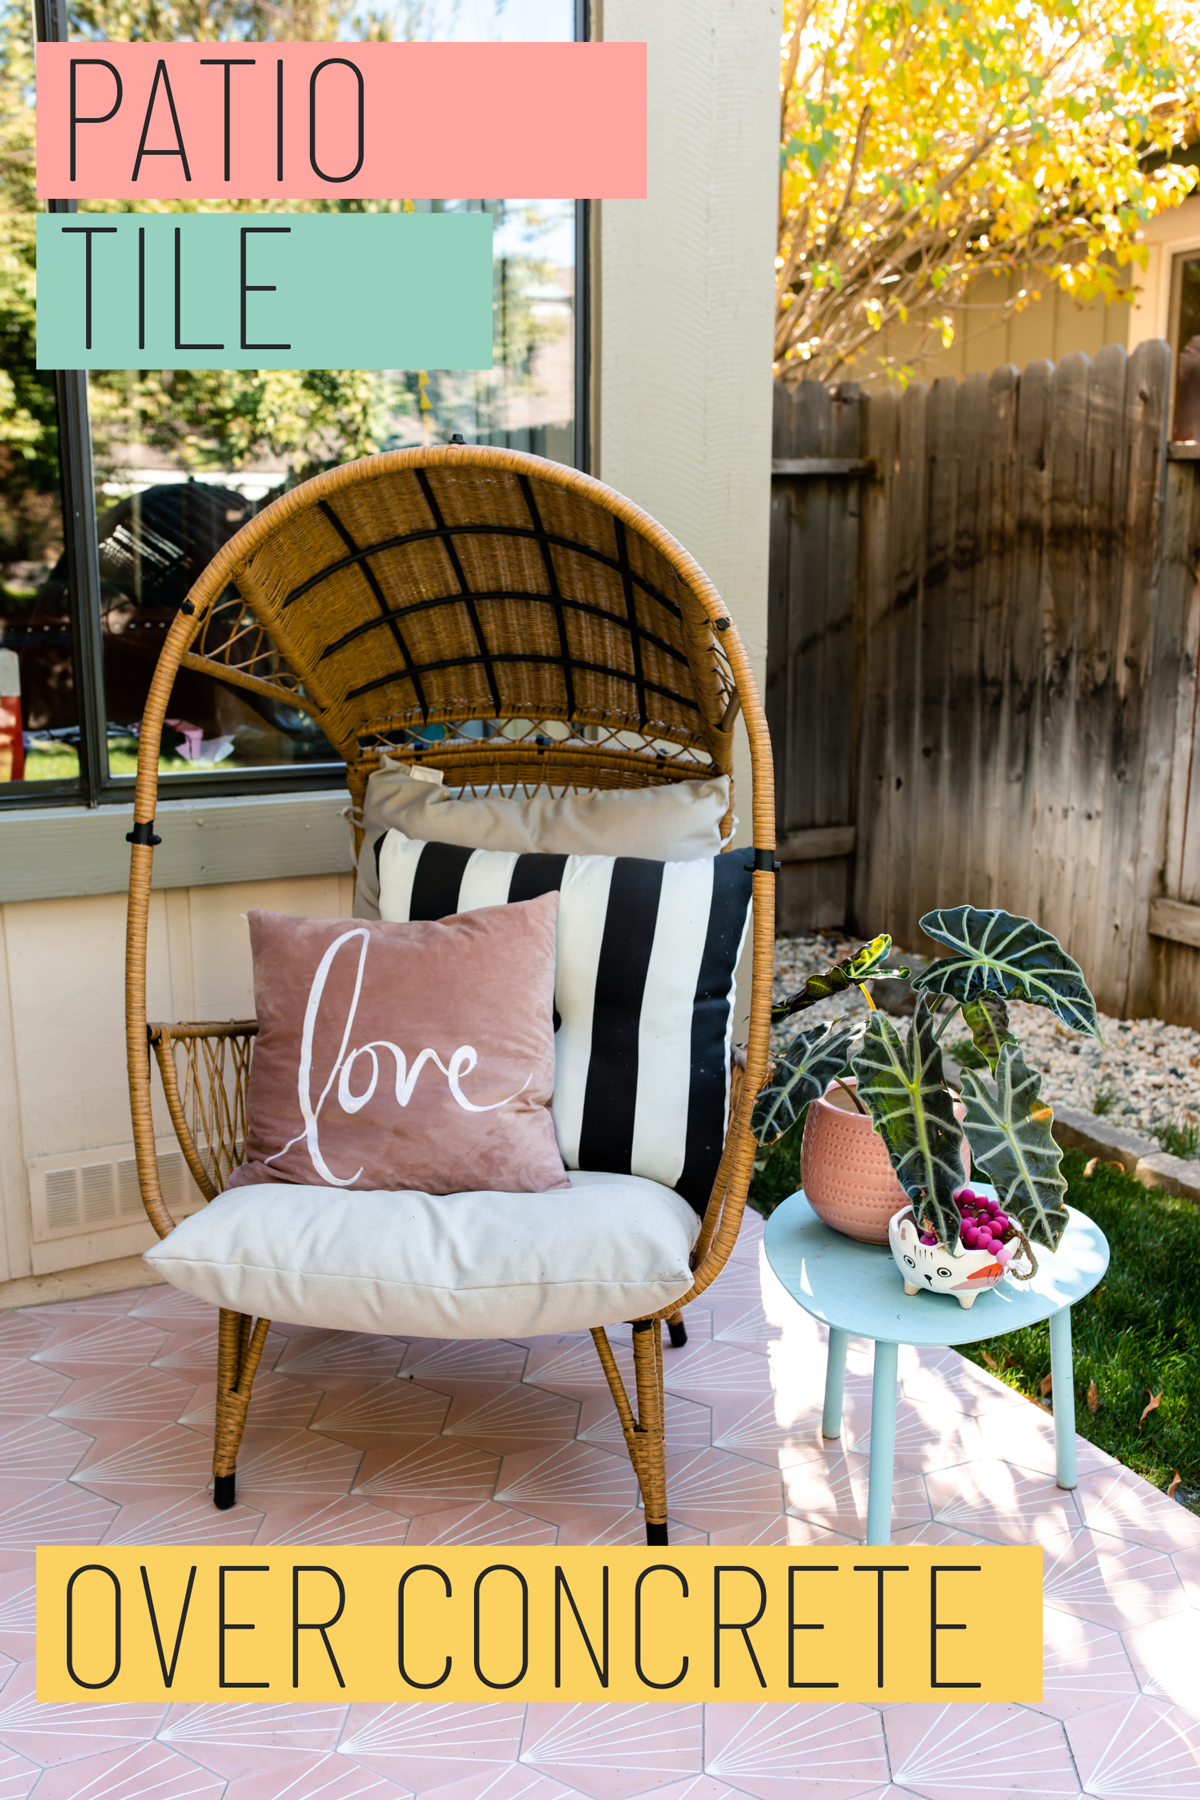
Inside: Creating a cute little sitting area by laying tile over concrete patio.
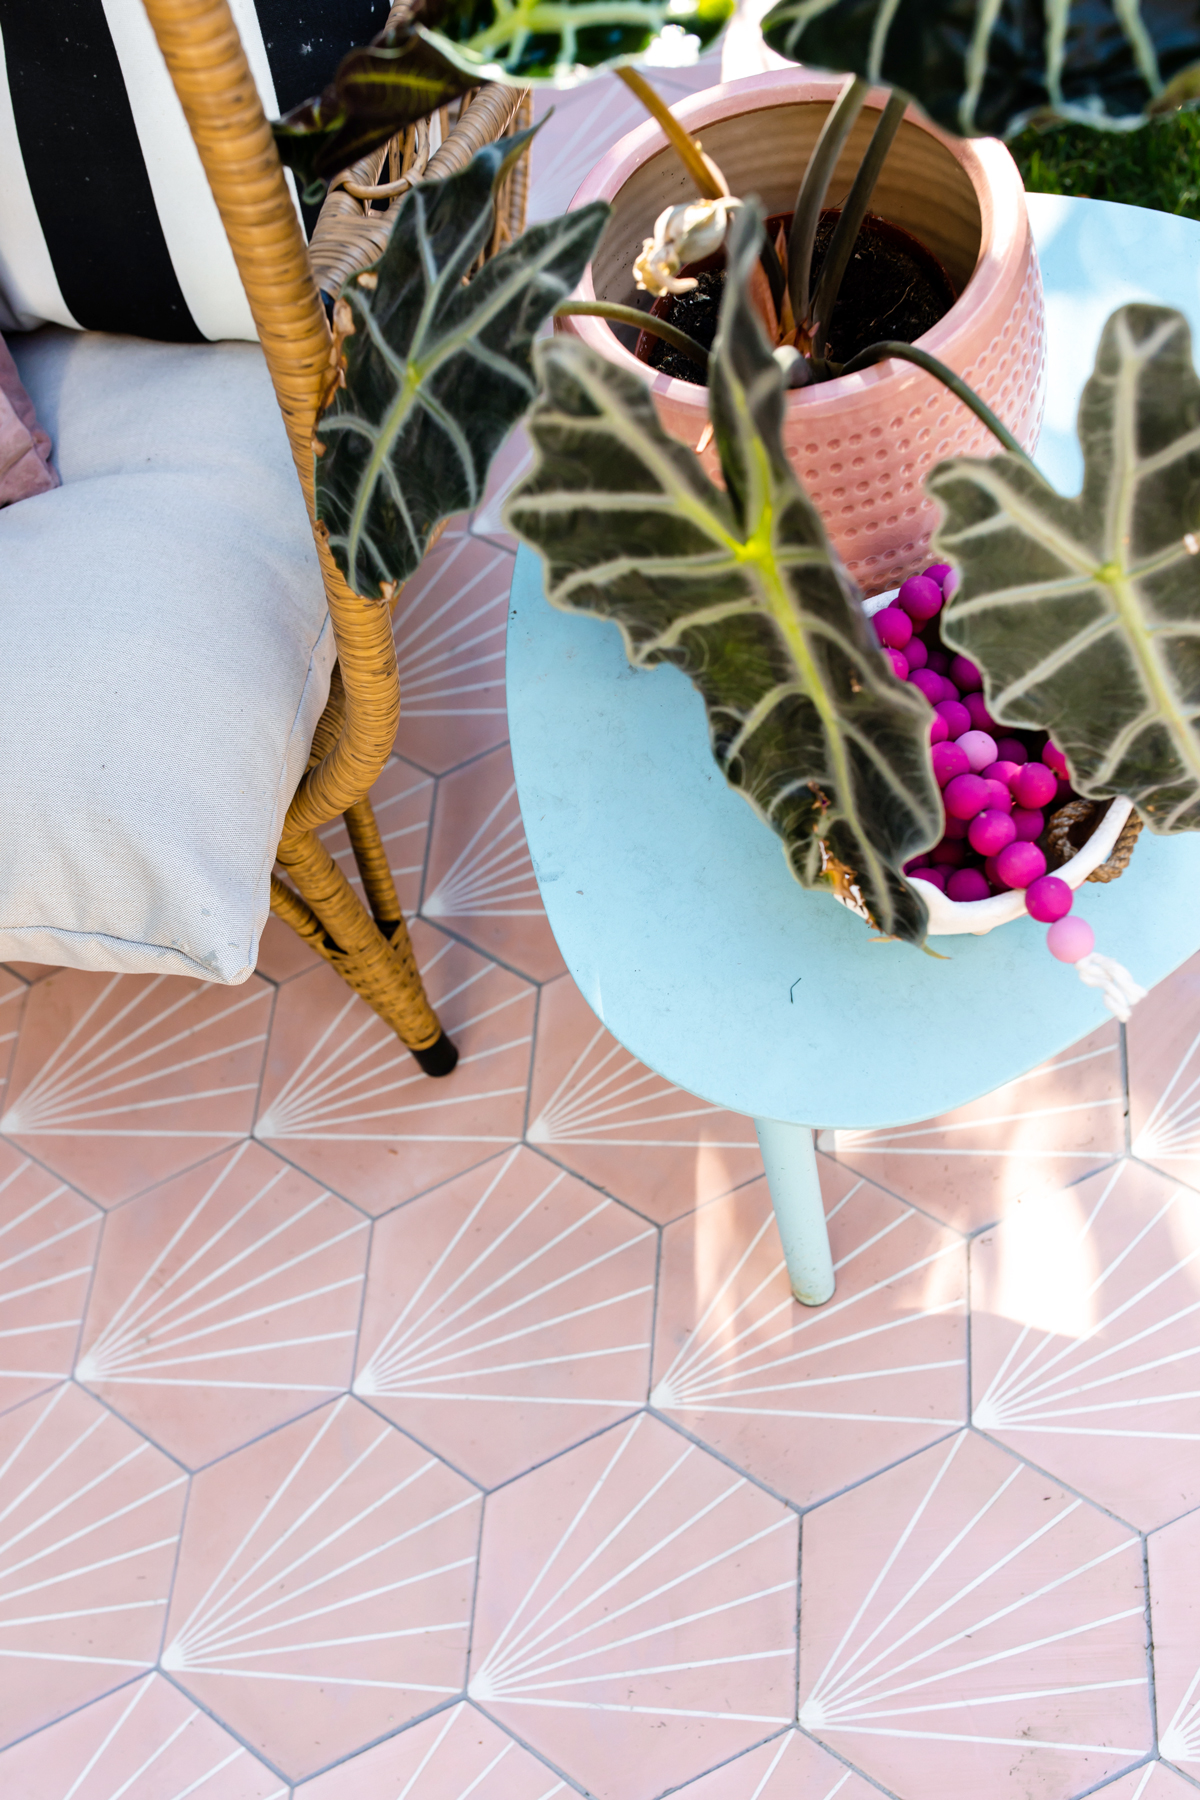
When we moved into this current house there was a small slab of concrete of to the side of the house. It is not our main deck or seating area, but a perfect little spot to sit and enjoy the trees and flowers in the DIY raised garden beds that we made and I planted nearby. To make this area more inviting and giving it a festive design boost I decided to use my favorite home decor color pink as the color base for the concrete tiles to create a fun & colorful spot to sit!
The project was simple, straightforward and totally worth the effort.
Follow along as I share more about the idea including step-by-step instructions below to create your own pretty patio sitting spot out of a simple concrete slab.
Can You Lay Outdoor Tiles Over A Concrete Slab?
The first thing I looked up when I was considering this project was if I actually could lay outdoor tiles over concrete this way. I was happy to find out that yes… absolutely you can lay outdoor tiles over a concrete slab!
The process involves a few steps, but it’s certainly a manageable project for a DIY enthusiast with some time on their hands or an easy project to hand out to your local tiling company.
How To Pick The Best Outdoor Tile Over Concrete
Choosing the best outdoor tile for your concrete depends on a variety of factors including your location, climate, intended use, and aesthetic preferences. Here are some common choices:
1. Porcelain
Porcelain tiles are popular for outdoor use due to their durability, low absorption rate, and variety of styles. They’re resistant to frost and damp conditions, and you can find porcelain tiles that mimic the look of wood, stone, or even concrete itself.
The downside to porcelain is that it can get really slippery, so if you live somewhere with a lot of rain or snow this might not be your best option.
2. Slate
Slate tiles offer a natural, rustic aesthetic. They’re durable, slip-resistant, and able to withstand harsh weather conditions. However, they can get hot underfoot in direct sun, so they might not be the best choice for pool decking in a sunny climate. If you are dealing with a covered patio though this would be a great option.
One thing to note is that slate can be uneven at times, so you’ll need to take that into account for barefoot outdoor use when putting this type of tile over concrete patio spots.
3. Travertine
Travertine is a type of natural stone that’s especially popular for pool decks. It’s naturally non-slip, stays cool underfoot even in direct sunlight, and provides a high end aesthetic. However, it does require regular sealing to maintain its appearance.
4. Granite
Granite tiles are incredibly durable and resistant to scratching. They’re also less porous than some other natural stones, making them a good choice for areas that see a lot of precipitation.
I considered this option for our small patio area, but there weren’t very many fun color and style ideas as I had hoped to find.
5. Quarry
Quarry tiles are unglazed clay tiles. They’re non-slip and hold up well in outdoor conditions. A great choice for patios and walkways due to their rustic, natural appearance, but again not exactly the festive design update I was looking for here.
6. Concrete
Lastly, you have concrete tiles. They offer the same benefits as your concrete slab – durability and weather resistance, but can be bought in a variety of colors and styles to add aesthetic appeal to your outdoor space.
This is what we went with as I found that it holds up to our weather the best. Since we get rain, snow etc here in Reno I wanted to ensure the tiles would last once laid down. And bonus they come in so many great color and pattern options.
How To Install Outdoor Tile Over Concrete Patio
Now that you have your tile picked out! Here’s a step-by-step guide for getting those cement tiles for outside installed onto your cement slab.
Step 1: Preparing the Concrete Slab
First things first, you need to ensure the concrete slab you are about to cover is in good shape. Check for any cracks or damage. We had a couple small cracks that we filled with a concrete repair compound, but larger ones might require professional attention.
Make sure the surface is clean, sweep off any dirt and use a pressure washer if you have one to get it nice and fresh. Let the concrete dry completely after washing.
Lastly, your concrete slab should be as level as possible. If there are any dips or rises, you may need to use a self-leveling compound or consider getting it professionally leveled. Ours was level when we started so it was ready to go with a little patching and cleaning.
Step 2: Layout and Measurement
Plan out how your tiles will be laid out. Whatever the tile project, I always start here! It’s way easier to make adjustments before everything is getting installed. You should consider the dimensions of your slab and the size of your tiles. Take measurements to ensure you have enough tiles to cover the area. Or if it’s a small enough area like our patio is, just lay the whole project out at once.
Don’t forget to account for the grout lines. They typically take up about 10% of the overall floor space. Start from the center of your slab and plan your way out to the edges.
Step 3: Applying Thinset
Now it’s time to start laying down tiles.
First, you’ll need to apply a layer of thinset. Thinset is a cement-based mortar that’s perfect for securing tiles to concrete.
If you’ve never tiled before this might be new to you, but I promise it’s a simple process once you get the hang of it.
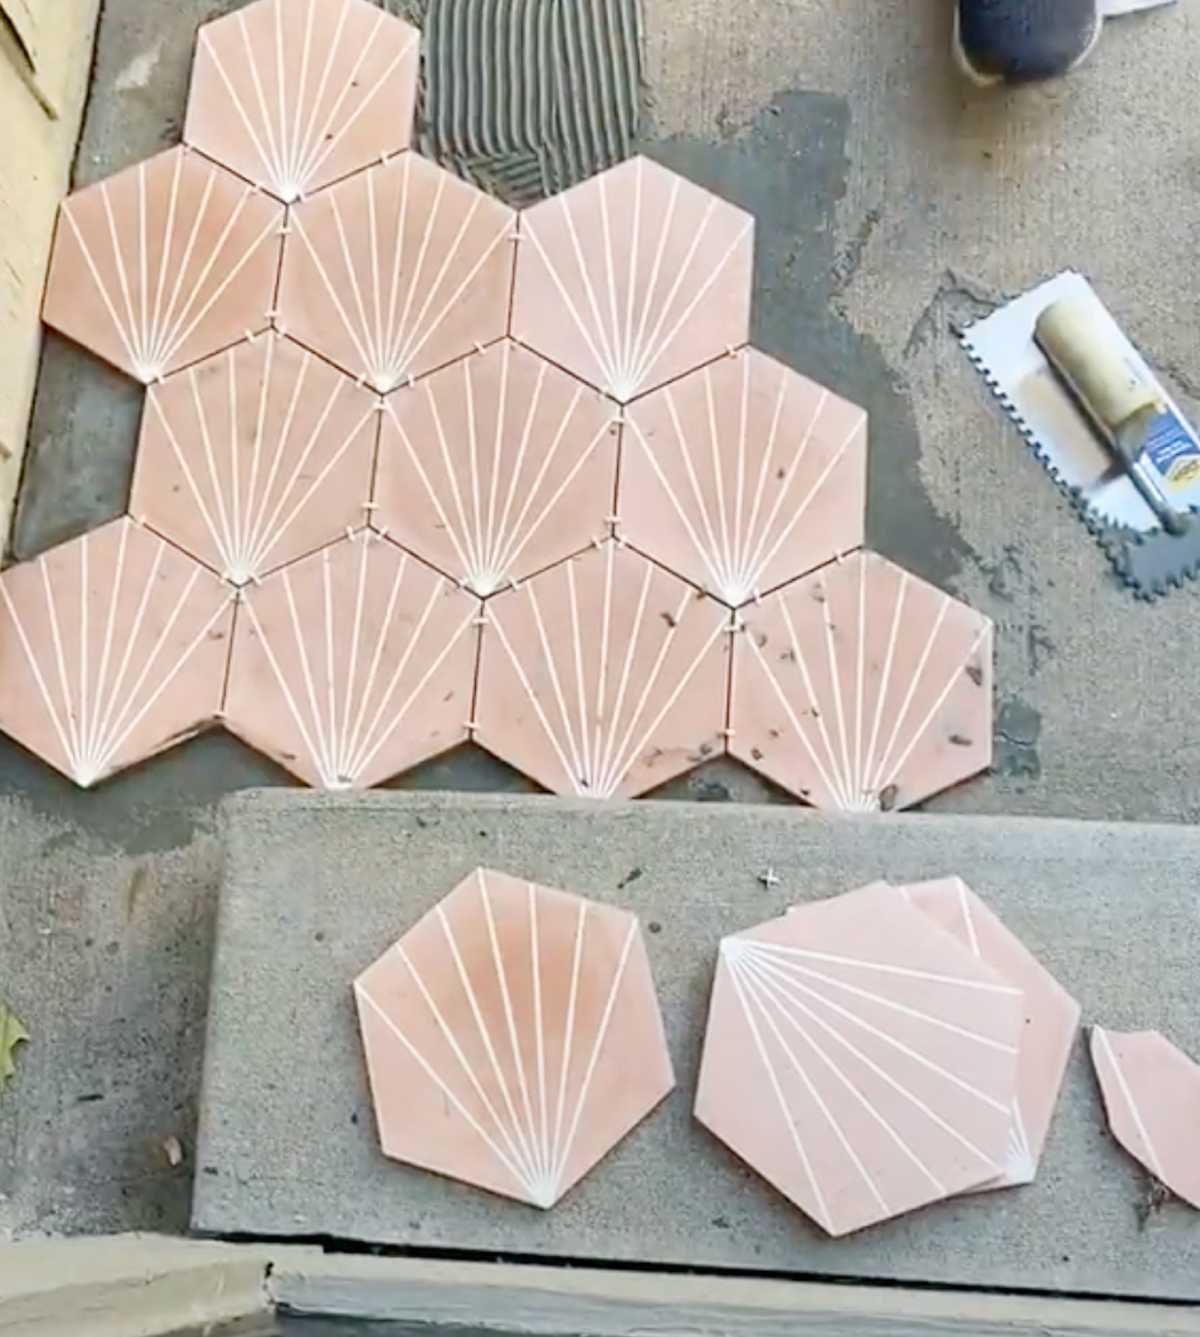
Mix your thinset with this tool and you’ll want to work in small batches here about 2×2 feet at max at a time.
Using a notched trowel, spread the thinset over a small area of the slab. The size of the notches should be appropriate for the size of the tiles. Generally, larger tiles require a trowel with larger notches. You can see below what size we used for these hexagon concrete tiles.
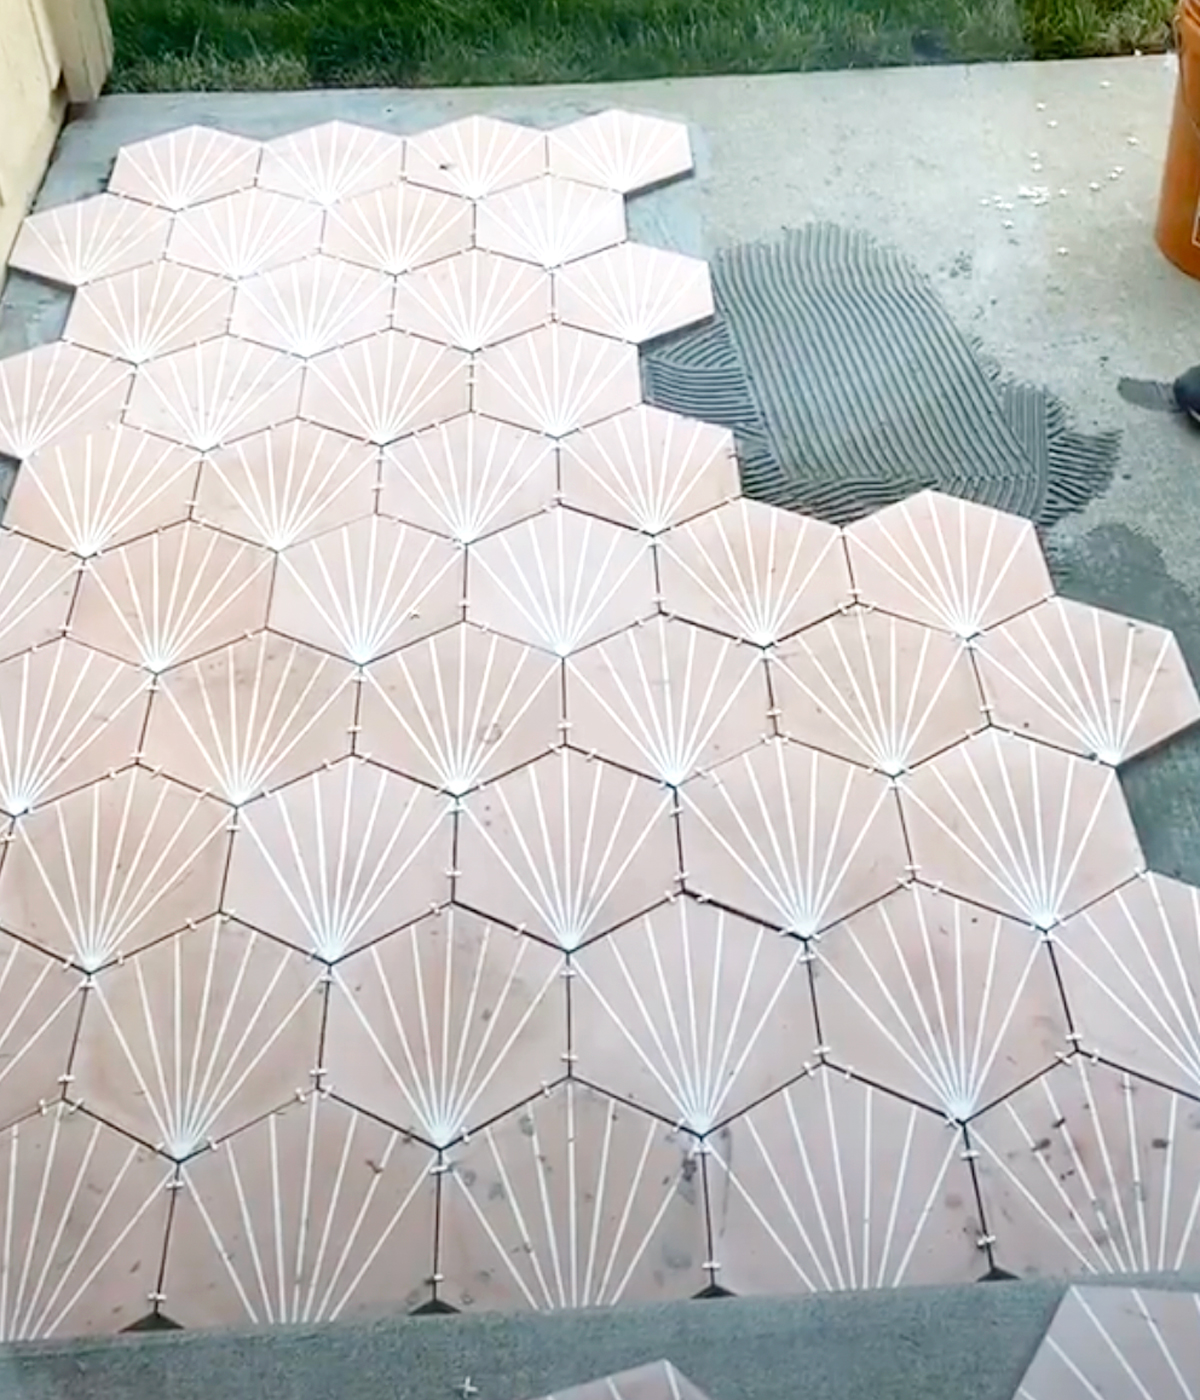
Step 4: Laying the Tiles
Place your tiles into the thinset, pressing down firmly to make sure they stick. You want to make sure each tile is level with the ones next to it, and use tile spacers to keep the gaps between the tiles even.
If you need to cut any tiles to fit at the edges of your slab or around obstacles, a tile saw will come in handy. Always wear safety gear when cutting tiles.
I like to start in the center and do the edges that need to be cut all at one time if possible – this always makes the project go faster.
Step 5: Sealing
Normally this step would come after the grouting for a normal indoor tile project. However, when you are tiling outside and using concrete tiles you need to seal the tiles before and after the grout! So you’ll actually do this step twice – once now and once after grouting.
After the grout has completely dried (usually another 24 hours), you should apply a grout sealer. This will protect the grout from moisture, dirt, and wear.
For outdoor tiles, you might also want to apply an exterior tile sealer. This can provide an extra layer of protection against the weather and extend the lifespan of your tiles.
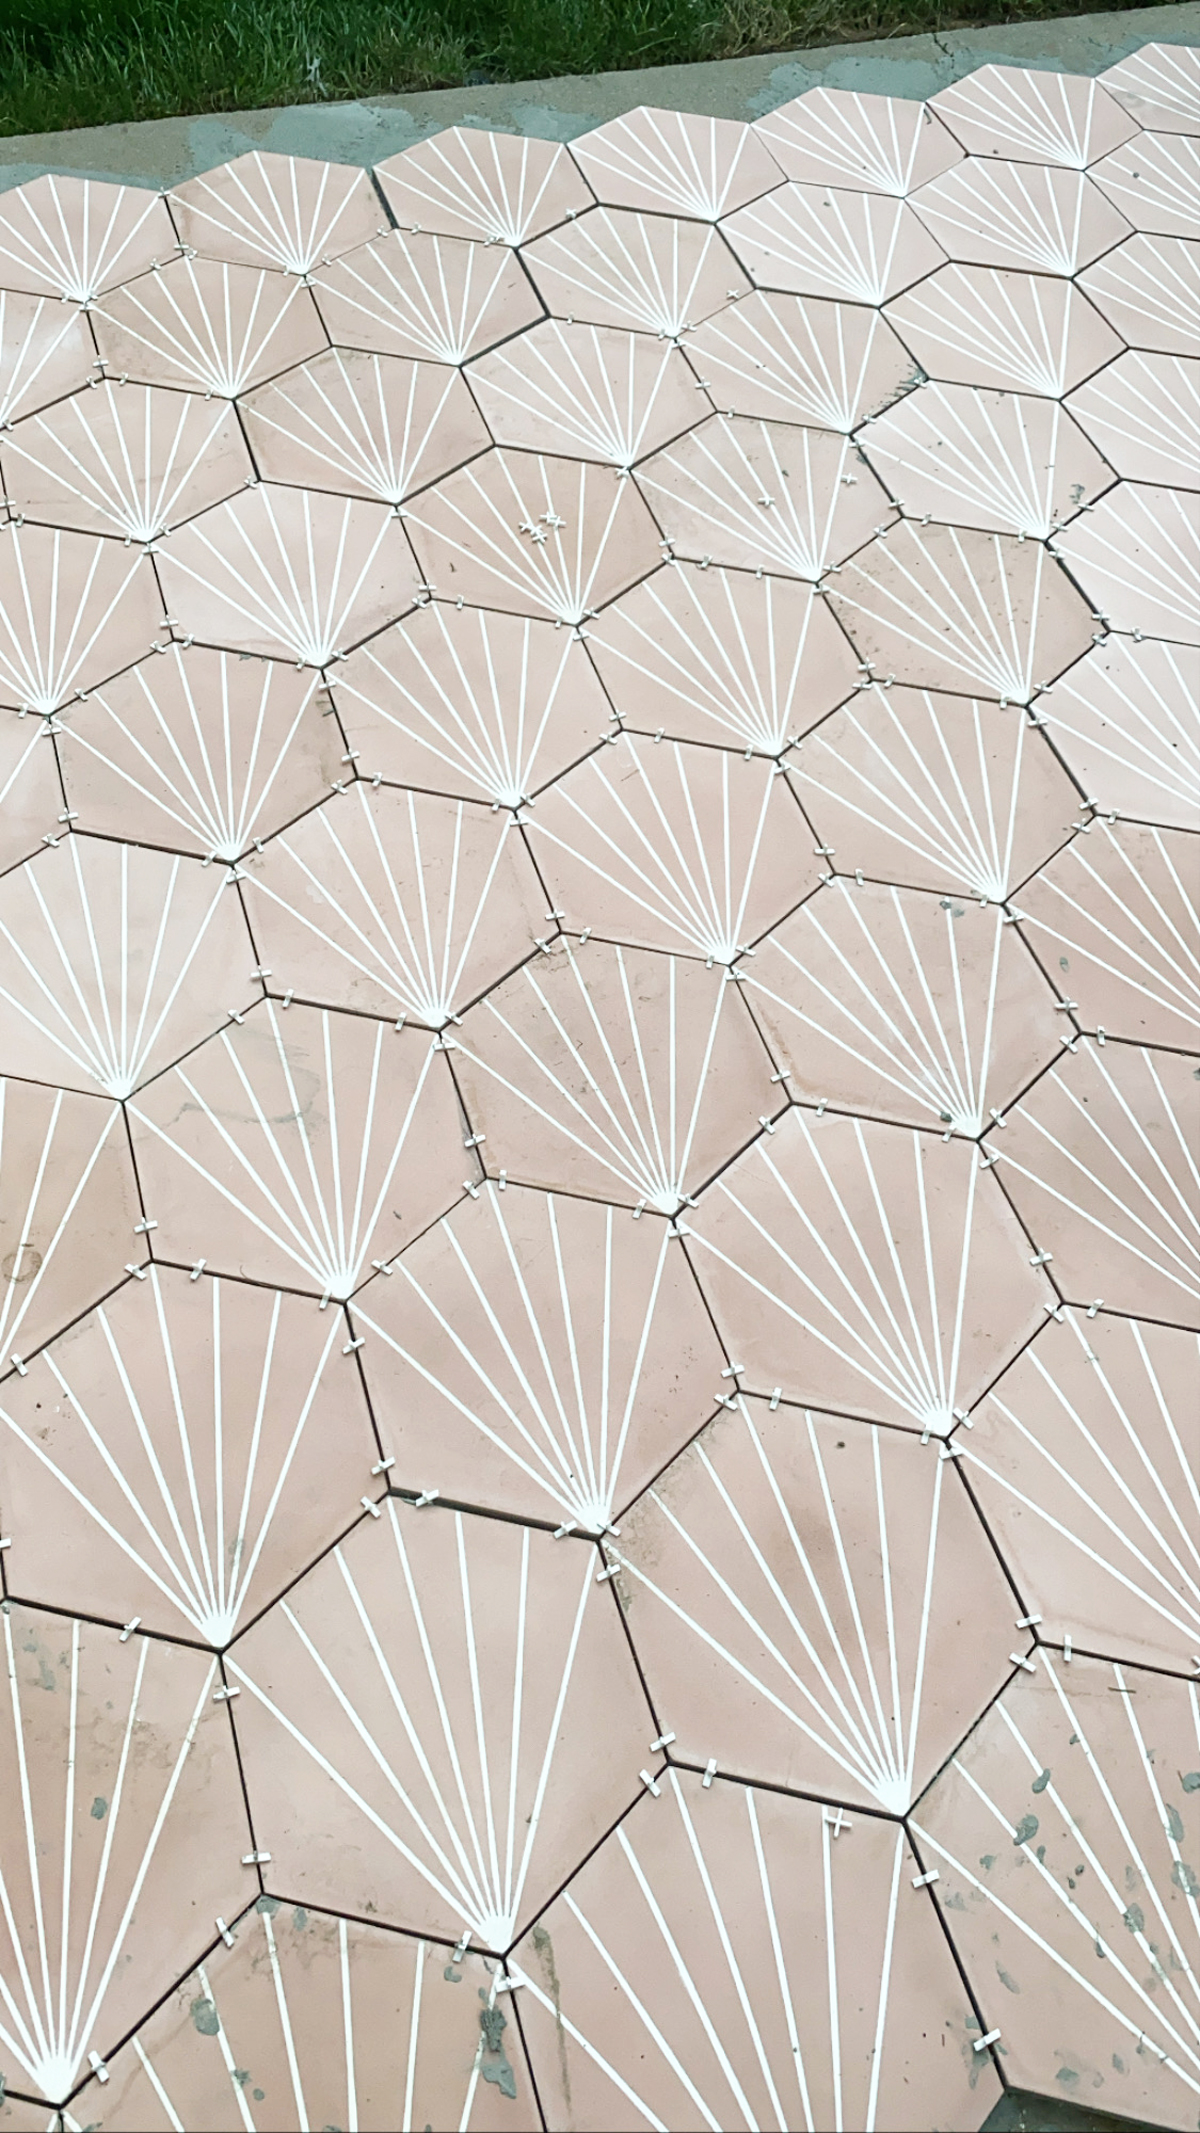
Step 6: Grouting your tile over concrete patio
After the thinset has dried (usually within 24 hours), remove the tile spacers. Mix your grout according to the manufacturer’s instructions, and use a rubber float to apply it into the gaps between the tiles.
Be sure to press the grout firmly into the spaces to avoid any air pockets. Once all the gaps are filled, wipe off any excess grout from the surface of the tiles with a damp sponge before it dries.
Voila! Now you’ve got a beautiful outdoor tiled area over your concrete slab. Be sure to keep it clean and reapply sealant as necessary to keep it looking fresh.
How To Make Sure Your Tile Is Slip Resistant
Making sure your outdoor tiles are slip-resistant is crucial for safety, particularly in areas that might get wet due to rain, pool water, or other outdoor factors. Here are my tips on how to make sure your outdoor tiles are slip-resistant:
1. Choose the Right Tiles
Opt for tiles specifically designed for outdoor use. These tiles are typically textured or have a non-slip coating, making them safer when they’re wet. Natural stone, like our concrete choice work great, or choose porcelain tiles with a textured surface.
2. Seal with a Non-Slip Coating
If you already have smooth tiles, or you’re unable to find outdoor tiles you like with a non-slip surface, you can apply a non-slip tile treatment or sealer. These products create an invisible coating on the surface of the tiles that increases traction when wet.
3. Regular Cleaning
Keep your tiles clean and free of moss, mold, and other debris. These can make the tiles slippery, especially when wet. Regular cleaning will also help maintain the effectiveness of any non-slip coatings you’ve applied.
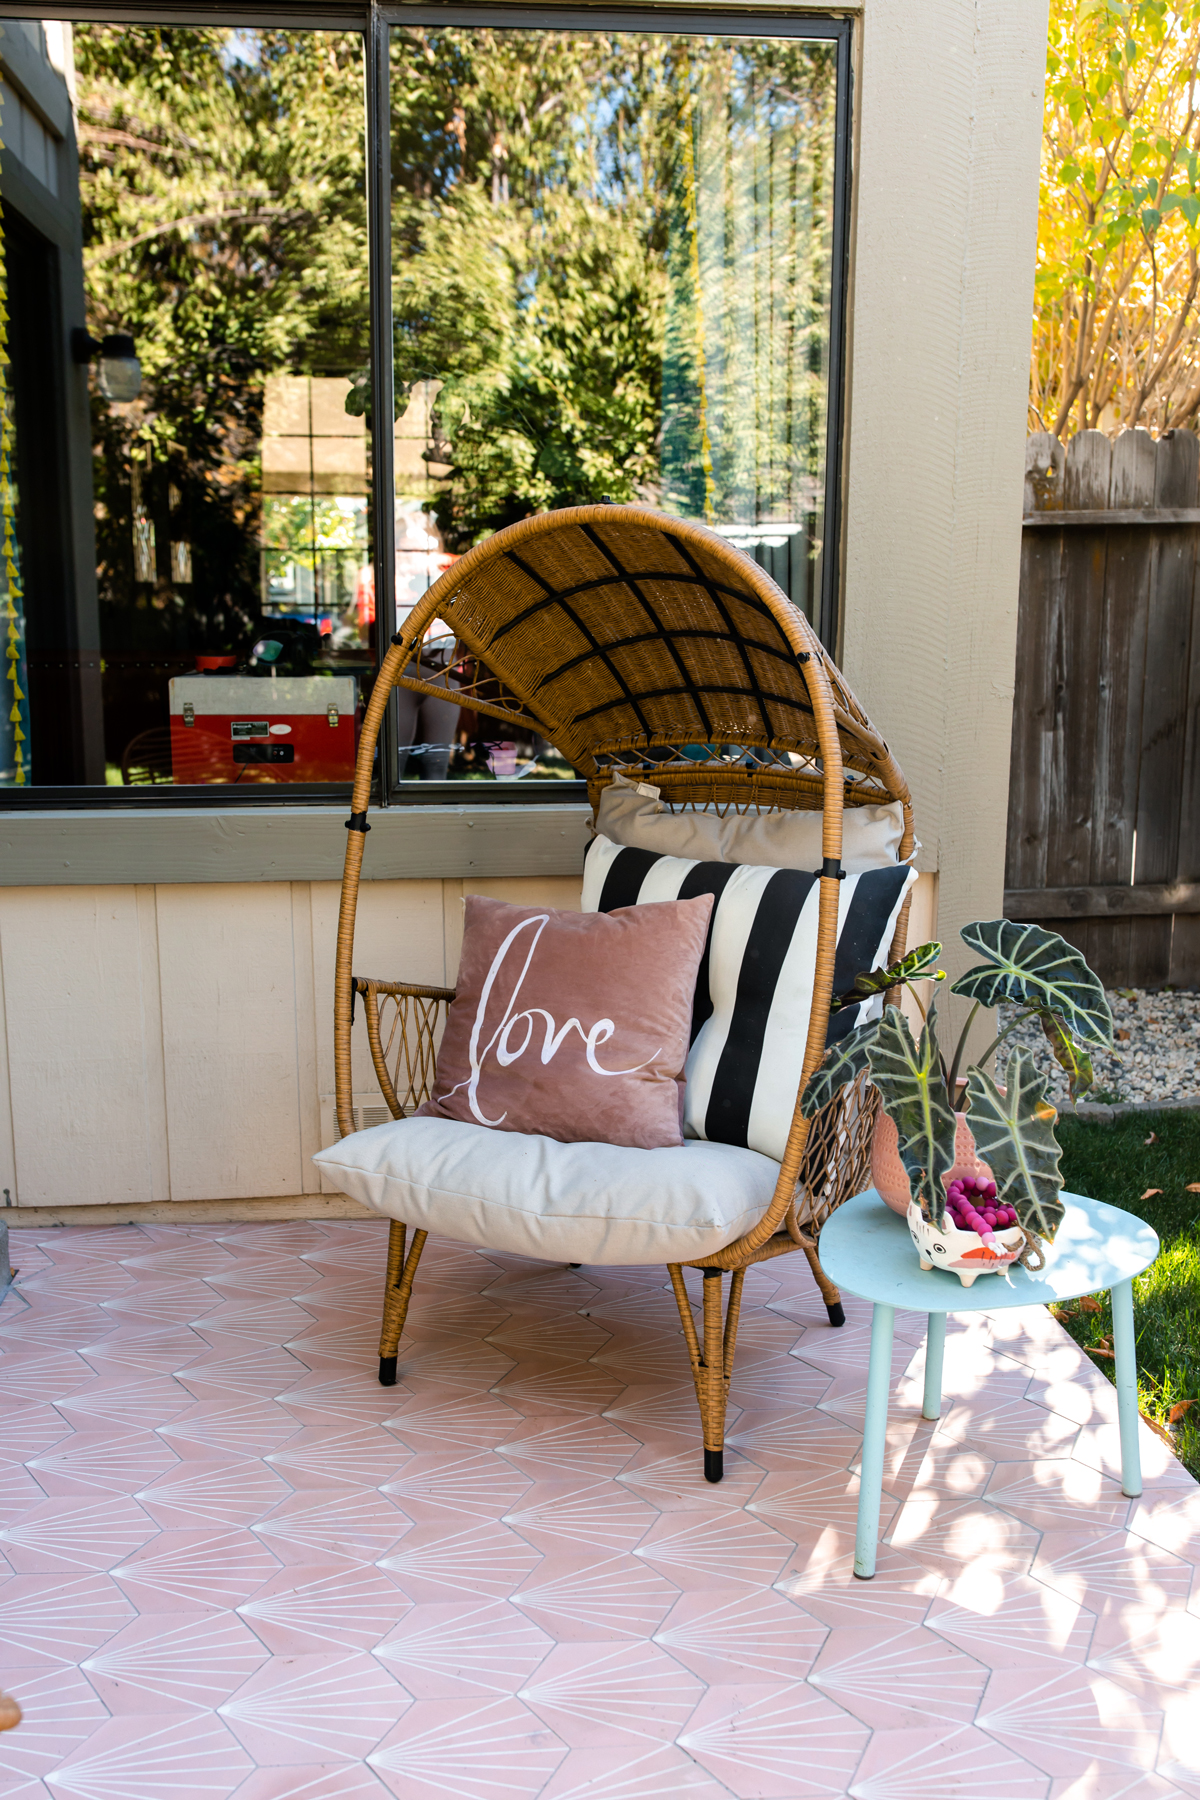
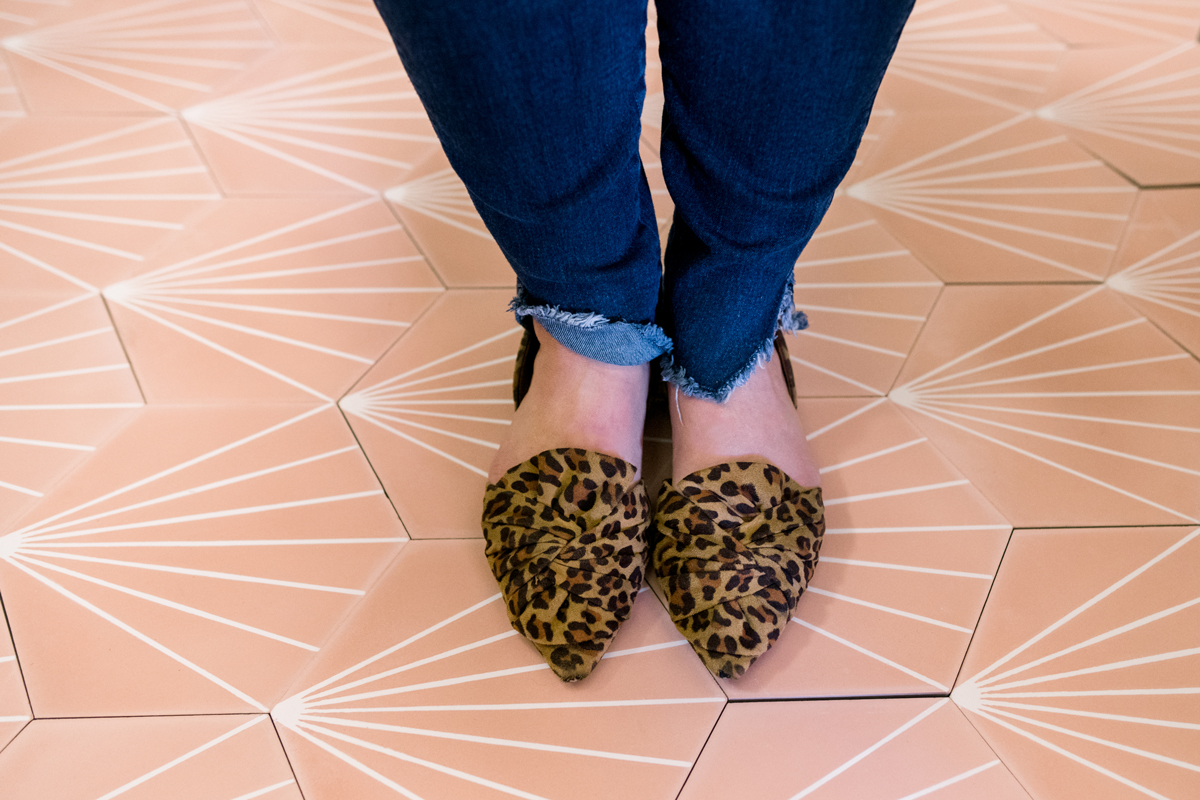
There you have it! My final tile over concrete patio look is perfect for this little shady spot and brings a festive & fresh design to an otherwise drab space.
Could you use this for a pool deck?
I had a some questions about this & yes, you certainly can use tile for a pool deck! I’m already dreaming of our next project with these tiles to surround a pool. Wouldn’t that be beautiful!?
There are additional considerations to take into account when tiling a pool deck compared to other outdoor areas:
- Slip Resistance: This is of utmost importance. A pool deck will frequently be wet due to splashing and dripping water. As we discussed earlier, make sure you choose tiles that have a slip-resistant surface. I’m just picturing my kids running here into the pool and how important this is to a wet swim area!
- Heat Resistance: Some materials can become uncomfortably hot under the sun. For this reason, you may want to avoid materials like dark-colored slate or dark porcelain, which absorb and retain heat. Light-colored tiles (may I suggest Pink!), or natural stone like travertine are often a better choice for a pool deck.
- Salt and Chlorine Resistance: If your pool uses salt or chlorine, these can affect certain materials over time. Make sure the tiles you choose are resistant to the chemicals you use in your pool. For anything porous like the concrete you will need to reseal often.
- Durability: The pool deck is likely to see high traffic, so the tiles need to be durable.
- Sealing: As with any outdoor tiles, applying a good quality sealant can help protect the tiles from weather, pool chemicals, and other potential damage.
- Maintenance: Some types of tile require more maintenance than others. Consider how much work you’re willing to put into maintaining the appearance of your pool deck.
As with any tiling project, proper installation is key. I’m thinking a pool deck might not be quite the DIY job, unless you are very skilled. Ha!
Hope this helps liven up your own backyard. I’d love to know if you try out the project.
Love the pink tile and would like to see other designs from mfg. Can u share the vendor. Thank you
I love this modern approach to outdoor tiles! The options you showcased really enhance the patio’s aesthetic while being durable for outdoor use. Can’t wait to try some of these ideas in my own space!
I love the idea of using outdoor tiles to refresh a concrete patio! The tips you provided on choosing the right materials and designs are super helpful. Can’t wait to try this out in my backyard!
I love the idea of using outdoor tiles over a concrete patio! It’s such a stylish way to enhance the outdoor space and bring in some personality. The tips you shared on choosing the right tiles were super helpful, and I can’t wait to try this in my own backyard! Thanks for the inspiration!